Welcome to our guide on safely removing your IMARA Press-On Nails without causing any damage to your natural nails. IMARA Nails is a fantastic brand known for its reusable, convenient, and non-damaging press-on nails. Whether you’ve worn them with glue for up to two weeks or with sticky tabs for a few days, it’s important to follow the proper removal process to maintain the health of your nails. Let’s dive into the step-by-step guide and ensure a hassle-free and gentle nail removal experience.
Understanding the Different Attachment Methods
Before we begin, let’s quickly review the two attachment methods for IMARA Press-On Nails. You have the option of using glue for a longer-lasting hold of up to two weeks, or you can opt for the convenience of sticky tabs for shorter-term wear. Depending on the method you chose, the removal process may slightly differ.
Gather the Required Materials
To safely remove your IMARA Press-On Nails, you’ll need a few essential items. Make sure you have a bowl of lukewarm water, some oil (such as olive oil or coconut oil), soap, a nail file, and a cuticle pusher on hand. These tools will help ensure a smooth and damage-free removal process.
Preparing for Nail Removal
Before we dive into the removal steps, it’s essential to prepare the area and your nails. Find a comfortable and well-lit space where you can easily follow the process. If you have any excess nail polish or decorations on your press-on nails, it’s best to remove them before starting the removal process.
Step-by-Step Guide for Safe Nail Removal
Now, let’s get into the step-by-step process of safely removing your IMARA Press-On Nails.
- Step 1: Soaking the Nails: Begin by filling a bowl with lukewarm water. Add a few drops of oil (such as olive oil or coconut oil) and some soap to create a gentle solution. Soak your hands in the bowl for approximately 15 minutes. The warm water and oil mixture will help loosen the adhesive, making the removal process easier.
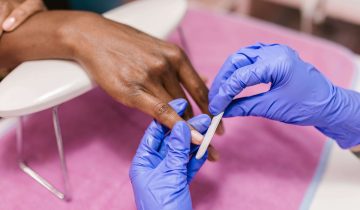
- Step 2: Gently Removing the Press-On Nails: After the soaking period, focus on one hand at a time. Gently lift the edges of the press-on nail using a cuticle pusher. Remember to be patient and avoid forceful pulling or twisting. Thanks to the soaking process, the nails should come off effortlessly without causing any damage to your natural nails.
- Step 3: Cleaning and Preparing the Natural Nails: Once you have removed all the press-on nails, take a moment to inspect your natural nails for any residue. If you notice any adhesive left behind, use a gentle nail file to smooth the surface and remove the remaining adhesive. Afterwards, apply a nourishing cuticle oil or moisturizer to hydrate your nails.
Caring for Your IMARA Press-On Nails: If you plan to reuse your IMARA Press-On Nails, it’s crucial to care for them properly. Clean any adhesive residue from the nails and store them in a clean and dry place for future use. With proper maintenance, your IMARA Press-On Nails can be enjoyed multiple times, providing you with stunning and non-damaging nail enhancements.
Congratulations! You have successfully learned how to remove your IMARA Press-On Nails safely and without causing any damage to your natural nails. By following the step-by-step guide and utilizing the soaking method, you can enjoy a hassle-free removal process. Remember, IMARA Nails offers the convenience of reusable and non-damaging press-on nails, making them a fantastic choice for stylish nail enhancements. Keep rocking your IMARA Press-On Nails with confidence, knowing that you can remove them safely whenever you desire a change.


 No products in the cart.